Setup a wallet for the “Lightning Network” on Mainnet
Setup a wallet for the “Lightning Network” on Mainnet
Die Deutsche Version ist hier.
Payments over the Lightning Network are as fast as lightning. But it takes a while to set up your device to be ready to pay.
This tutorial is meant for non-technical users who want to pay with their mobile phone. Therefore it will focus on apps for mobile platforms.
These instructions are specific to Bitcoin Mainnet! You will deal with real money. If you are looking for instructions for testnet, here is a tutorial.
Step 0: Disclaimer
Before we start, we want to make clear, that the Lightning Network is a technology that is still considered to be “experimental”. This means that there is no guarantee that everything will work smoothly and without errors. In the worst (but rather unlikely) case, you can lose money or might not be able to spend it for some time.
We therefore urge you to start with small amounts!
Step 1: Install the app
At the time this tutorial is written (start of September 2018), there are only Mainnet compatible apps available for Android devices. Apps for Apple iOS will hopefully be released soon.
All the screenshots shown here are from the “Eclair” wallet. But the process is similar in other apps, so you should be able to use this tutorial too.
- We install the app “Eclair Wallet Mainnet” from the Google Play Store:

- At startup, the app also informs us about the “beta” state of the software:
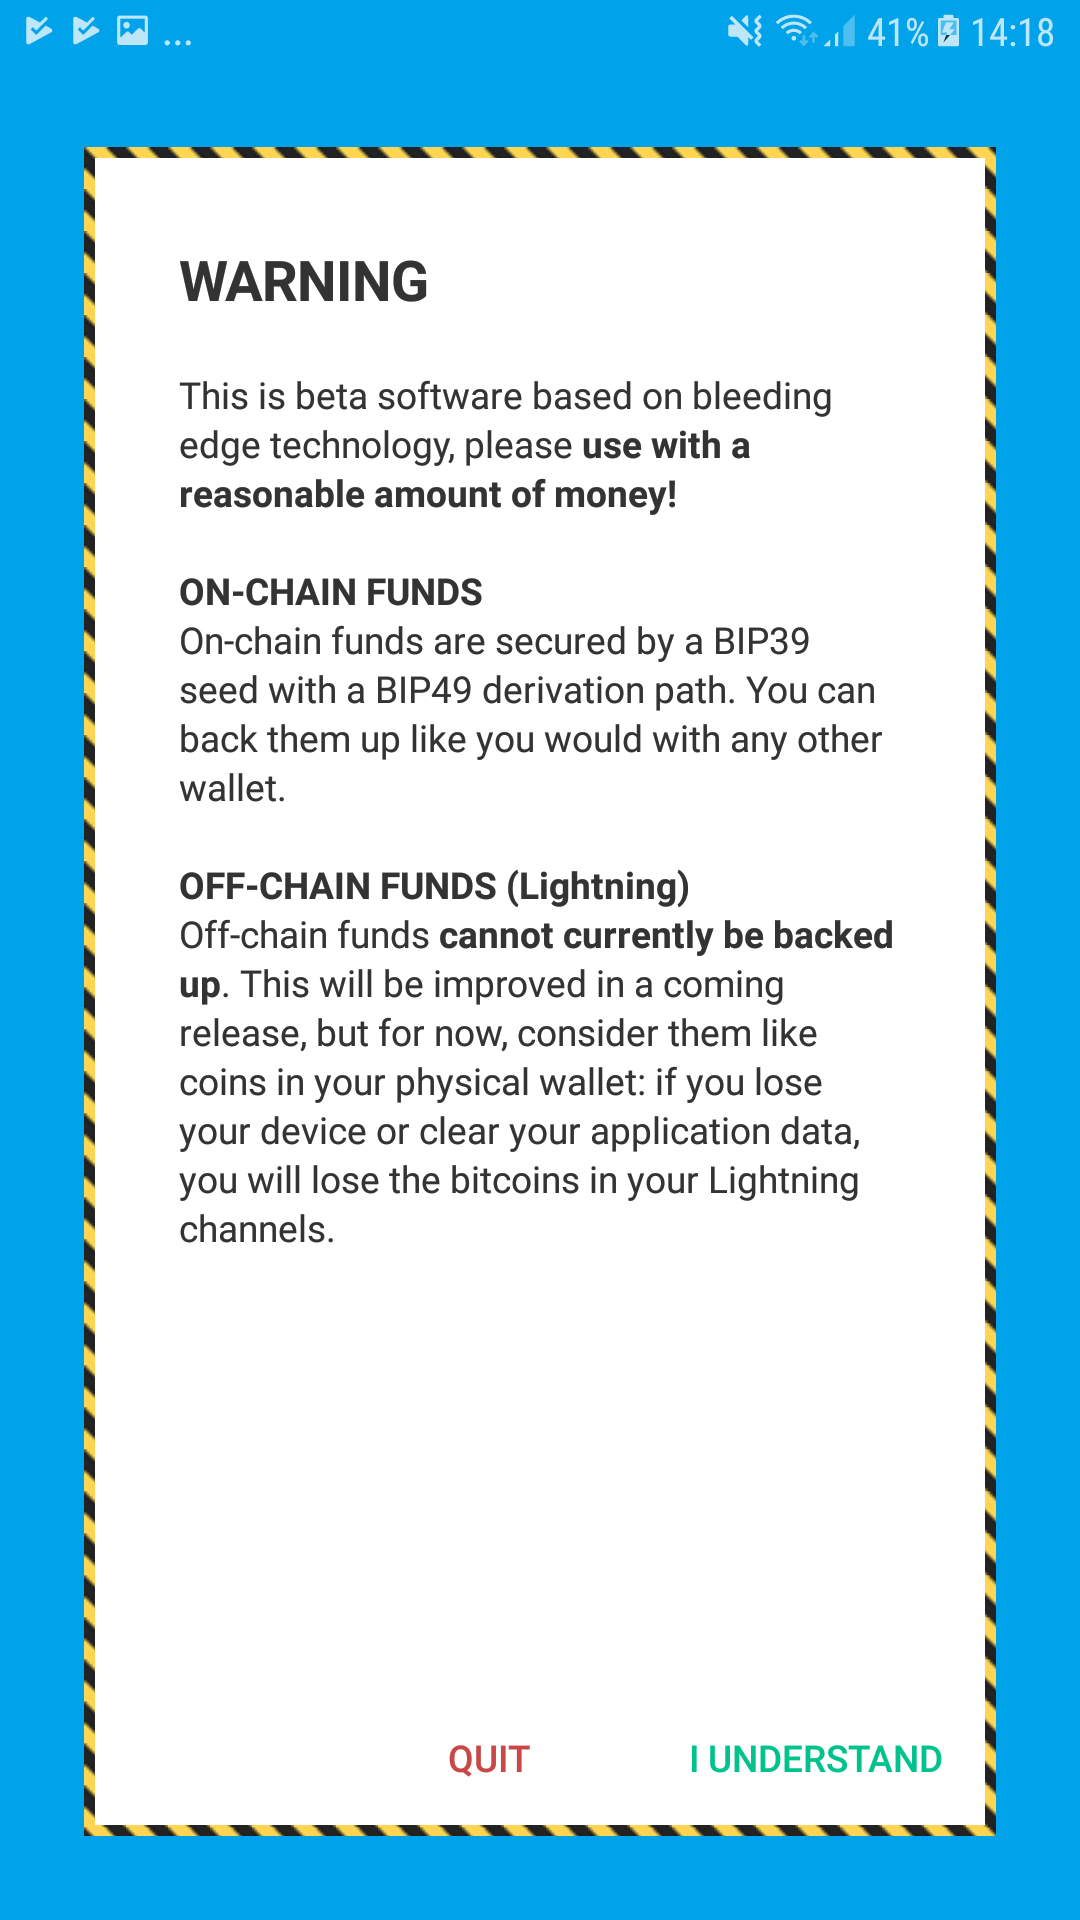
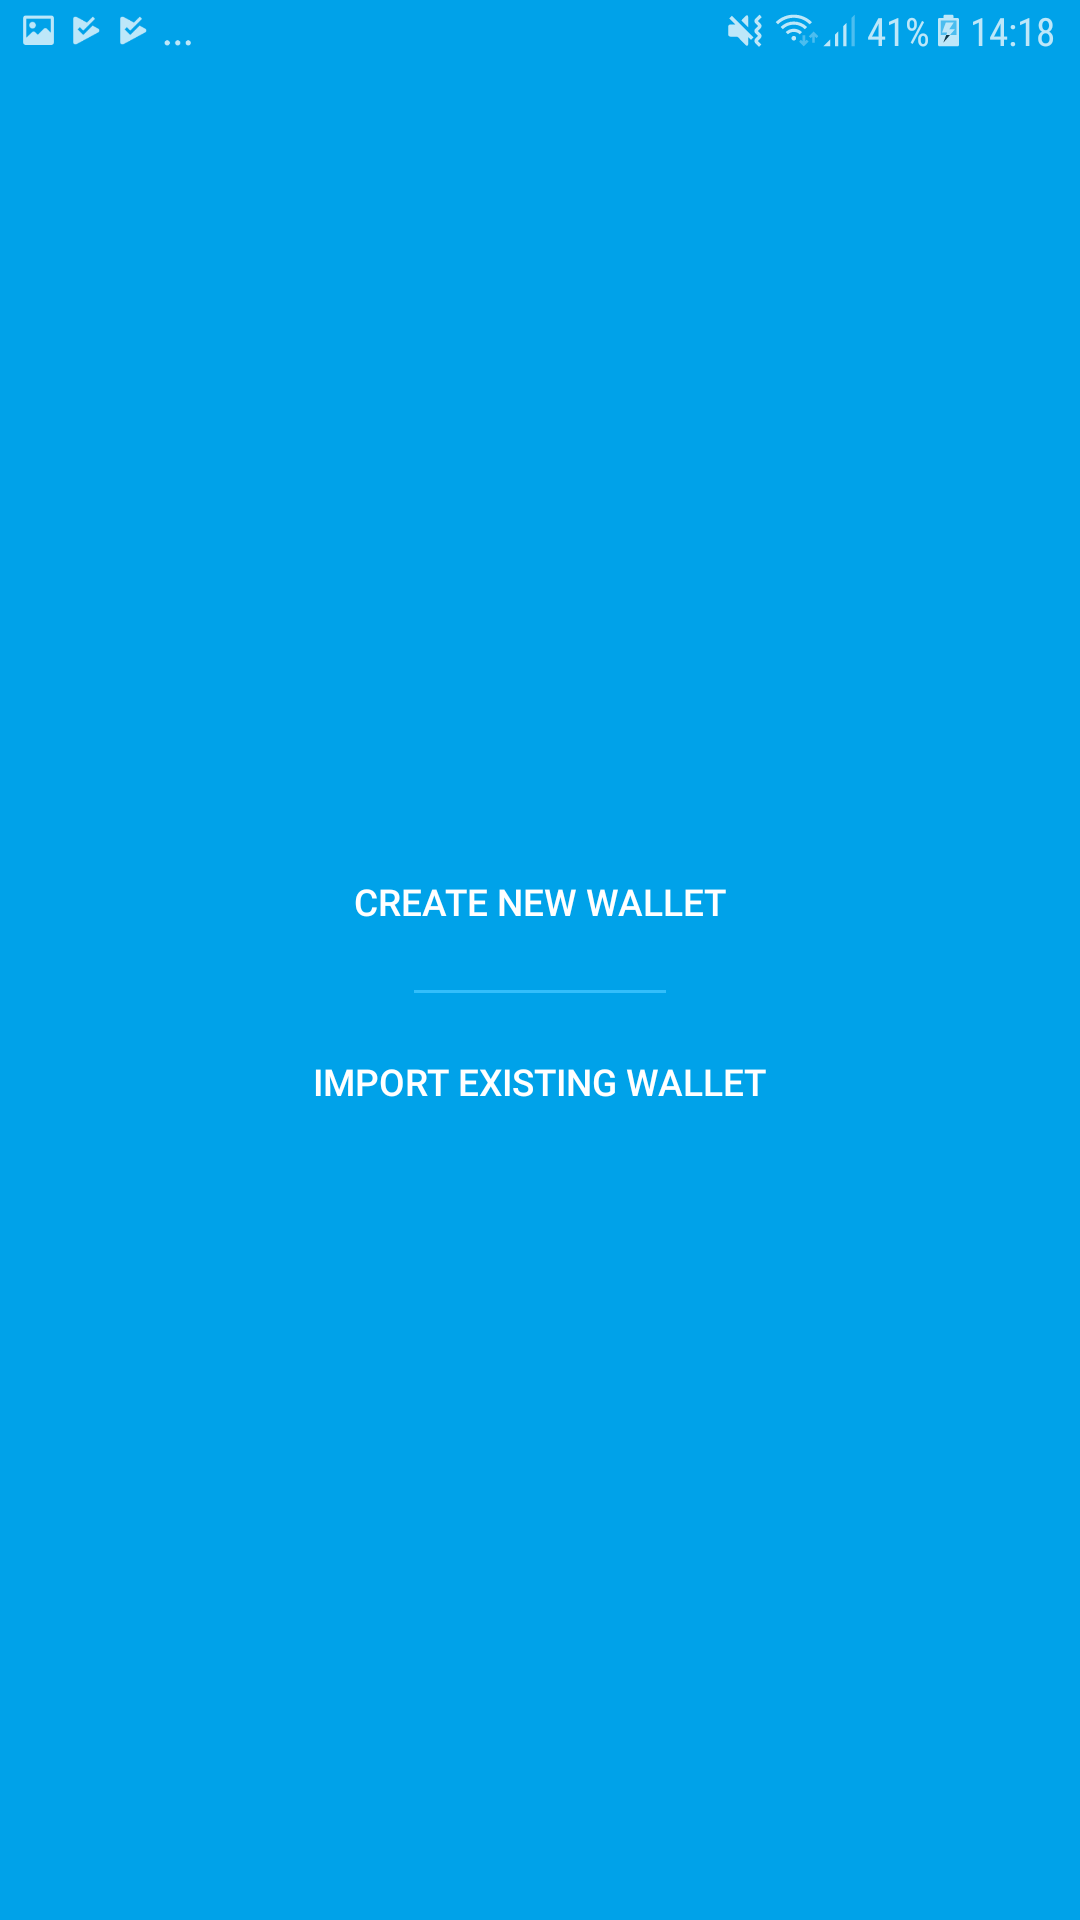
- After we acknowledge the warning, we are asked if we want to create a new wallet
or want to import an existing one. Since we don’t have one yet, we choose
“Create New Wallet”:
- The next part is very very important: The 24 words, also called the mnemonic phrase.
There is no screenshot shown here because these 24 words are very secret. They represent the cryptographic access code to the whole balance of Bitcoin that will be stored in the wallet later. Or in other words: The person who has access to them, has access to the money!
Therefore:- Write down the words and store them in a safe place: If you lose your mobile phone or it stops working, you can restore your wallet with these words. Without them, everything is lost! There is no bank that can “unlock your account”. So best put the paper with the 24 words into a safe.
- Never hand out these words to anyone: A person or website asking you for the words is very likely a scammer who tries to steal your money. Only type your words into an app to restore a backup. And only into an app you know comes from a trustworthy source.
- After you’ve written down the words, the app will check that you indeed did do so. It will
ask for three randomly selected words out of the 24 you wrote down. You will need to type
them, separated by a space. Once completed, the app will also ask you for a PIN.
This PIN only protects the app itself from unauthorized access, in case your phone gets stolen.
In contrast to the 24 mnemonic words, you can change the PIN any time.
After setting up a PIN, you will see the main interface of the app.
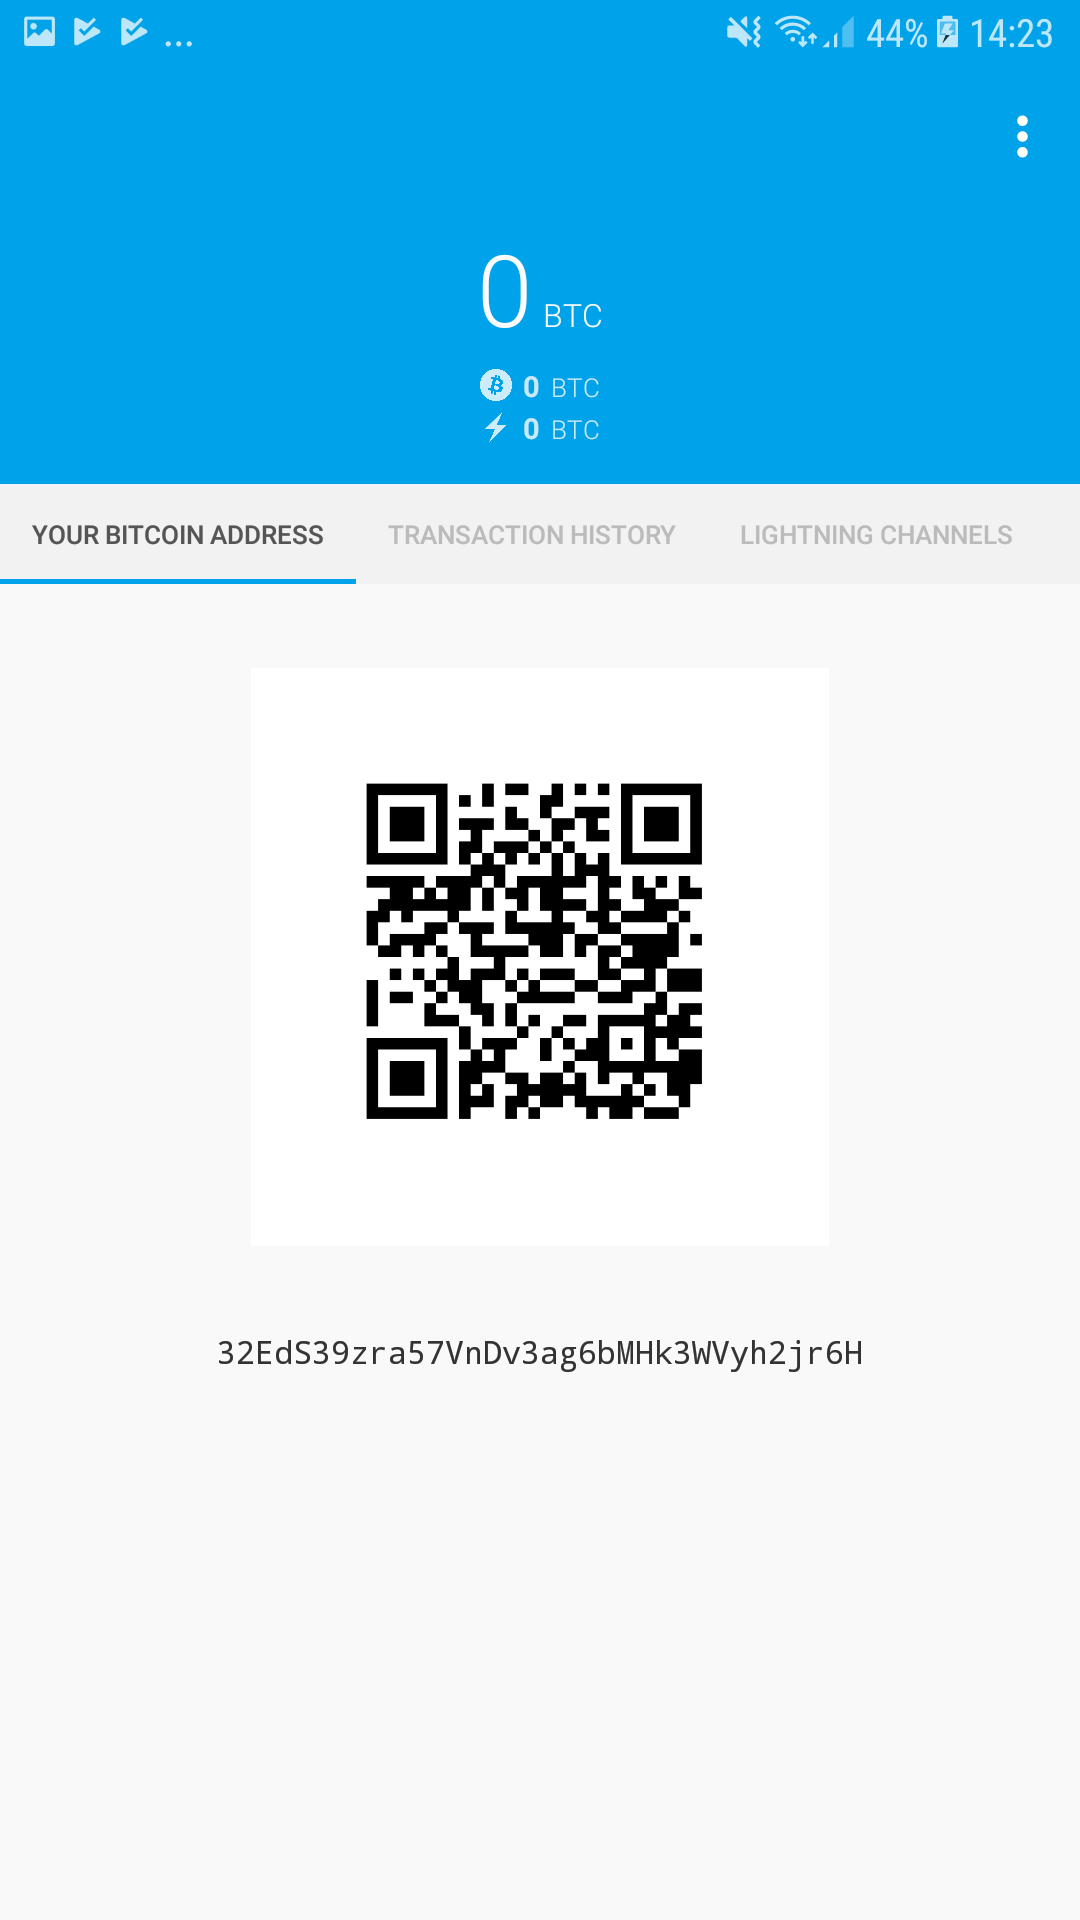
You have now successfully installed the wallet. There are three main screens in the app that you can navigate to by swiping your finger left or right:
 |
 |
 |
| Left: Your Bitcoin Address | Middle: Transaction History | Right: Lightning Channels |
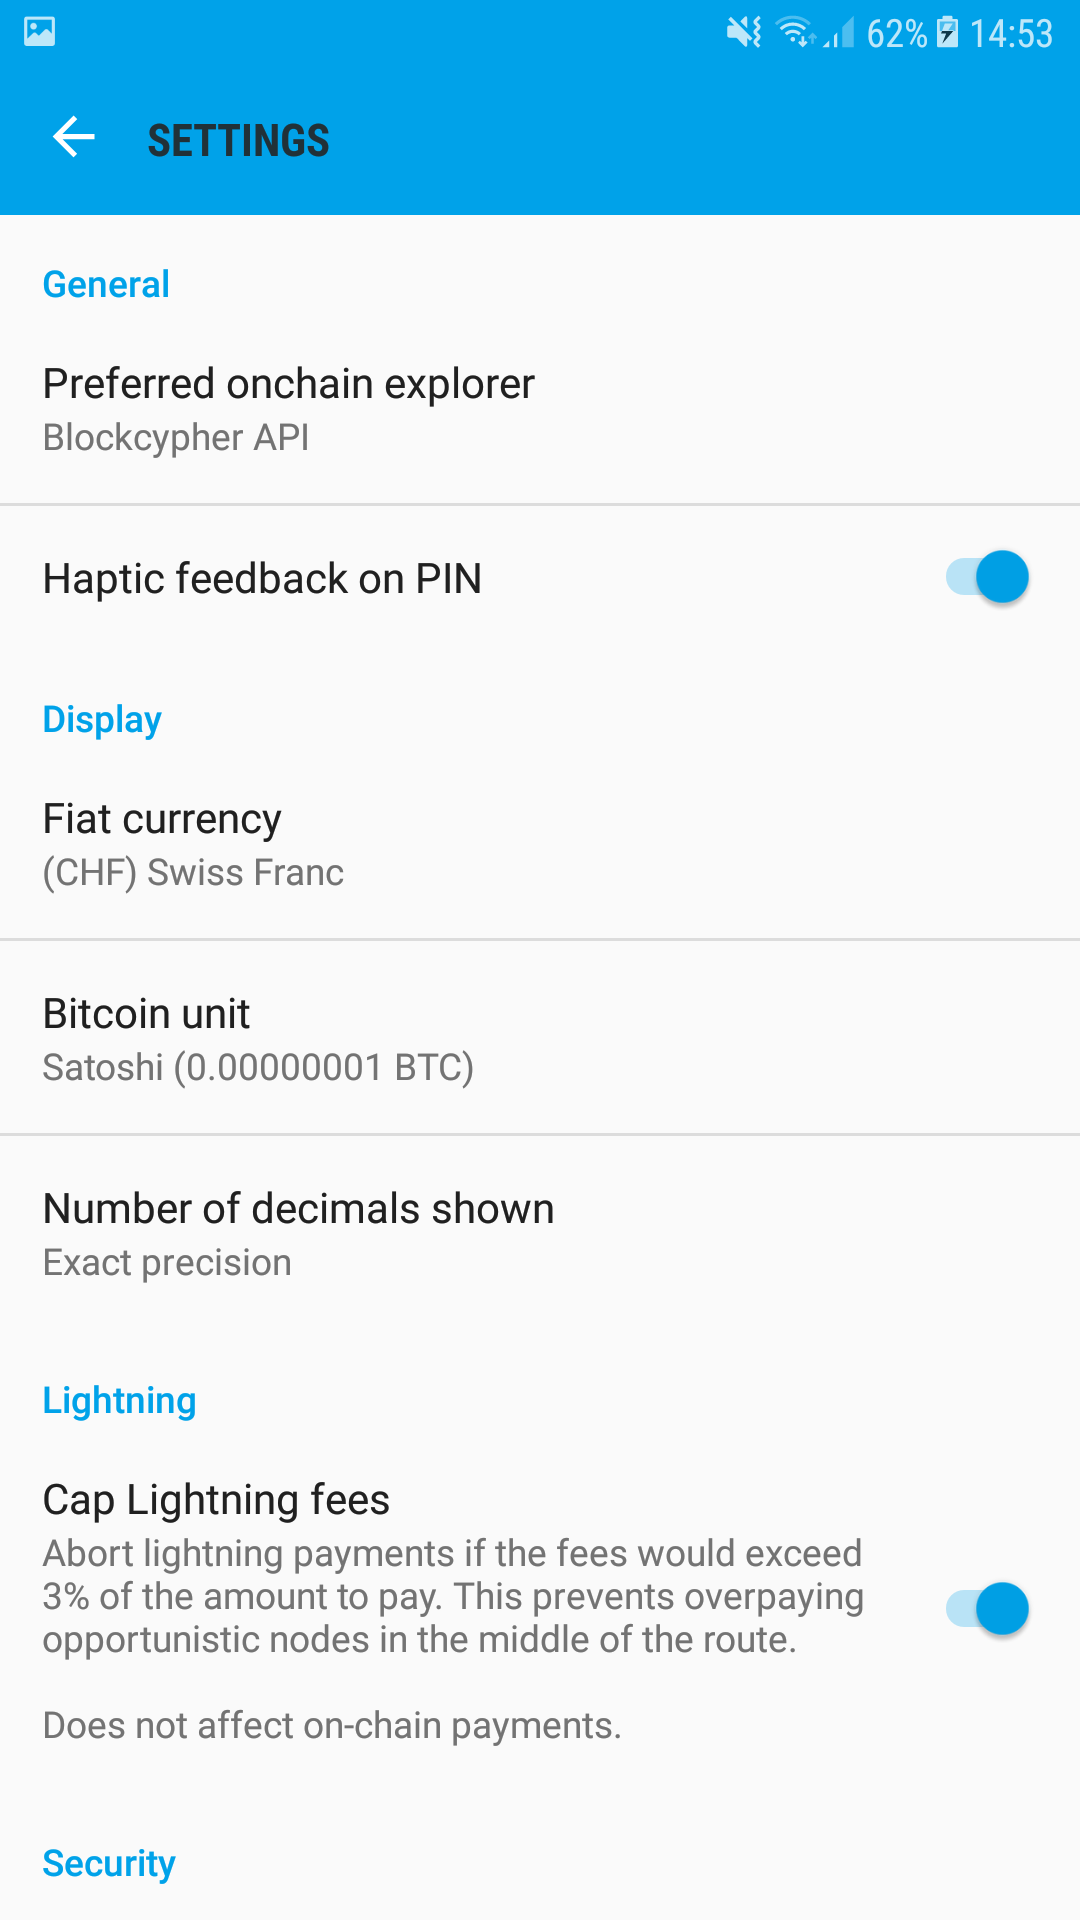
Since we are going to buy Swiss Francs, it’s probably a good idea to change the monetary units
the app displays. Most of the following screenshots will show CHF for fiat currencies and
Satoshi (= 0.00000001 bitcoin, BTC) as Bitcoin unit.
You find these settings in the following menu:

Step 2: Buy bitcoins
Our wallet is now ready to receive some bitcoins. There are many ways to do so. We are going to show you an option that is easy, straightforward and works at every train station in Switzerland: Buy bitcoins at a SBB ticket machine.
All that we need is a Swiss mobile number that can receive text messages/SMS. Bitcoin purchases at the ticket machines are limited to CHF 500.- per mobile number and day. This is enforced by sending a mTAN as a text message to a mobile phone.
Once we are in front of the ticket machine, we select “Prepaid” and then “Top up Bitcoin” on the
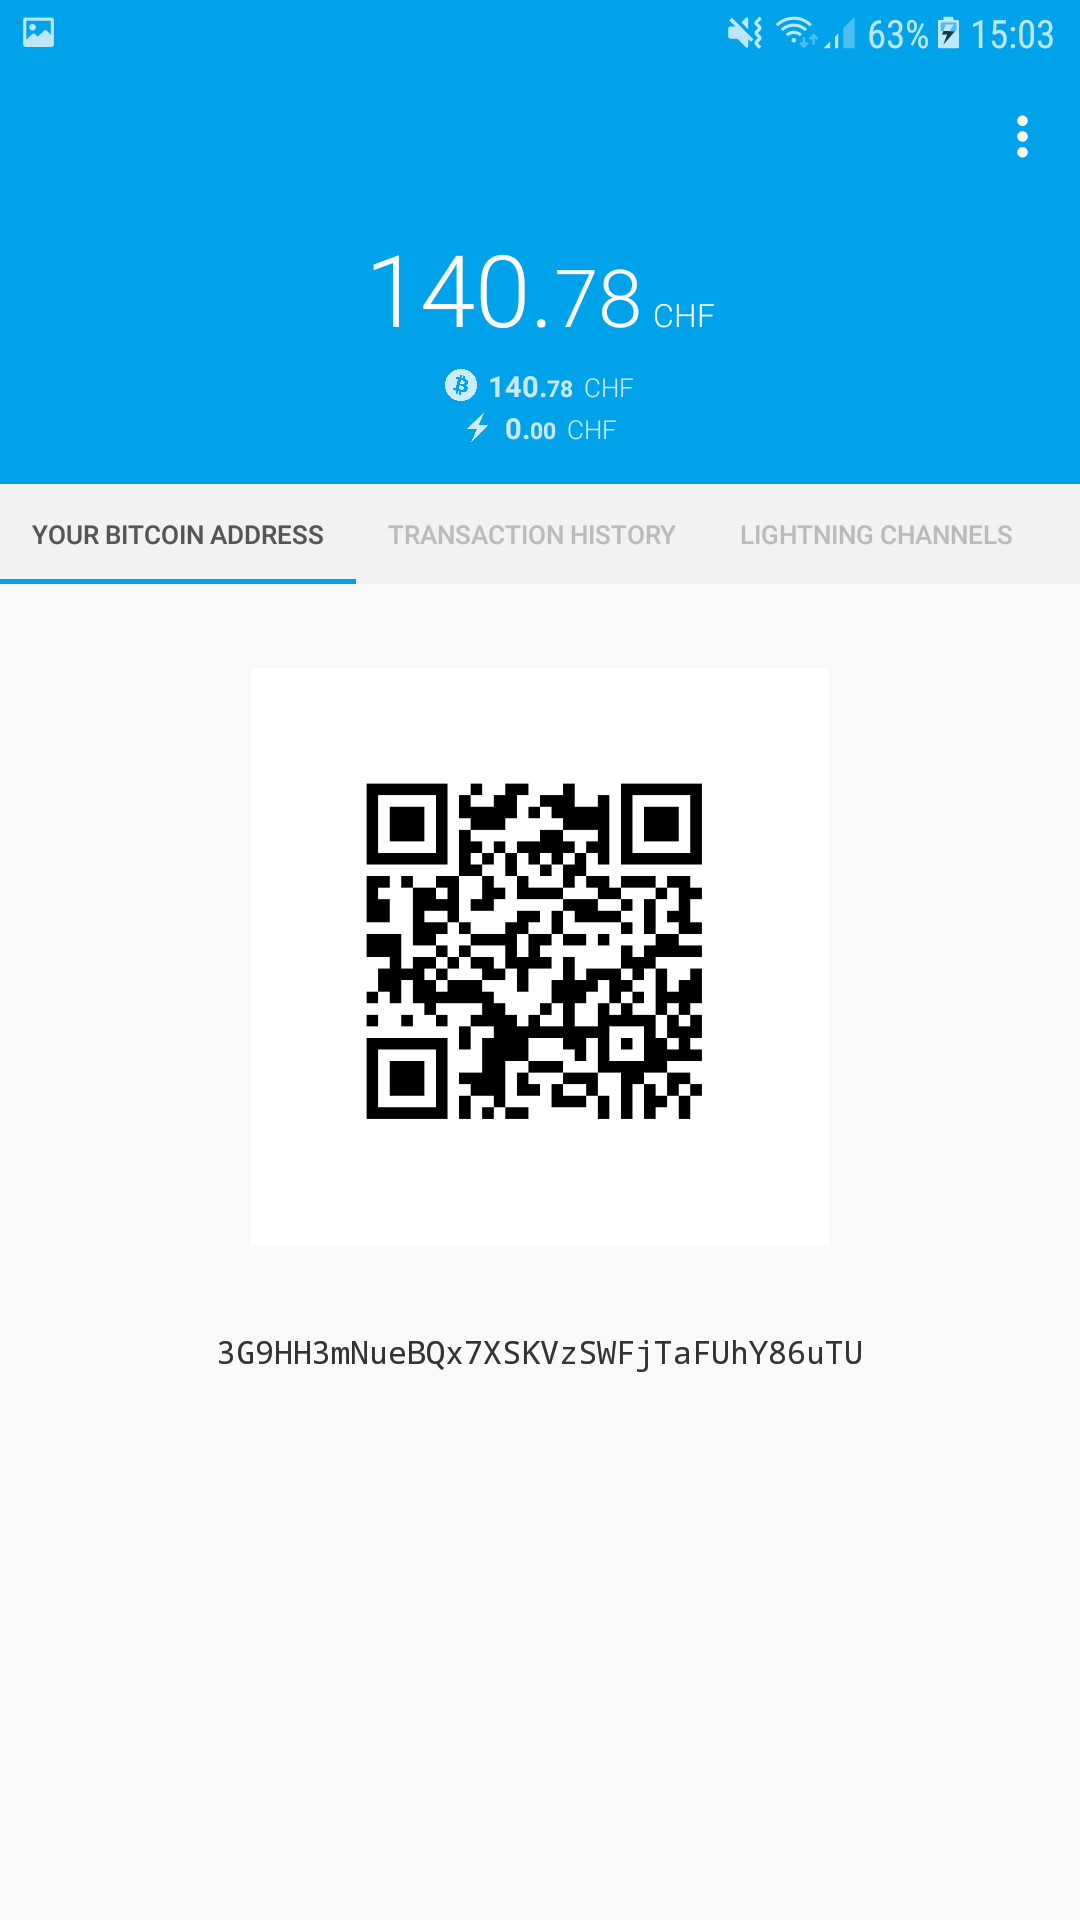
touch screen. The first thing we will be asked for is our Bitcoin address.
The ticket machine can scan the QR code that is displayed in our Eclair app. So we
open the app, swipe right to show the QR code (in the tab “Your Bitcoin Address”)
and hold our mobile phone screen below the camera of the ticket machine:
Depending on the ambient light and the brightness of your screen, this can be a bit tricky. Don’t put your mobile phone too close. A distance of approximately 20cm proved to be optimal. If it doesn’t work within a minute or two, it’s possible that the ticket machine reverts to its main screen. Try again by tapping “Prepaid” and then “Top up Bitcoin” once more.
As soon as the ticket machine is able to read the address, it will show it on screen. It is always advised to check the first and last four characters of a Bitcoin address, so we do that now too.
The machine now asks us what amount we want to exchange into bitcoins. After selecting the amount we will need to enter the mobile number and will then receive a code in a text message. Enter the code when the ticket machine asks for it.
Now we should see a summary of our order, the fees and the exchange rate we will get. If we agree with everything, we can pay the order either with cash or with a bank card. The payment will be confirmed with a paper receipt that will contain the same information again.
In our app we should see something similar to this in our “Transaction History”:
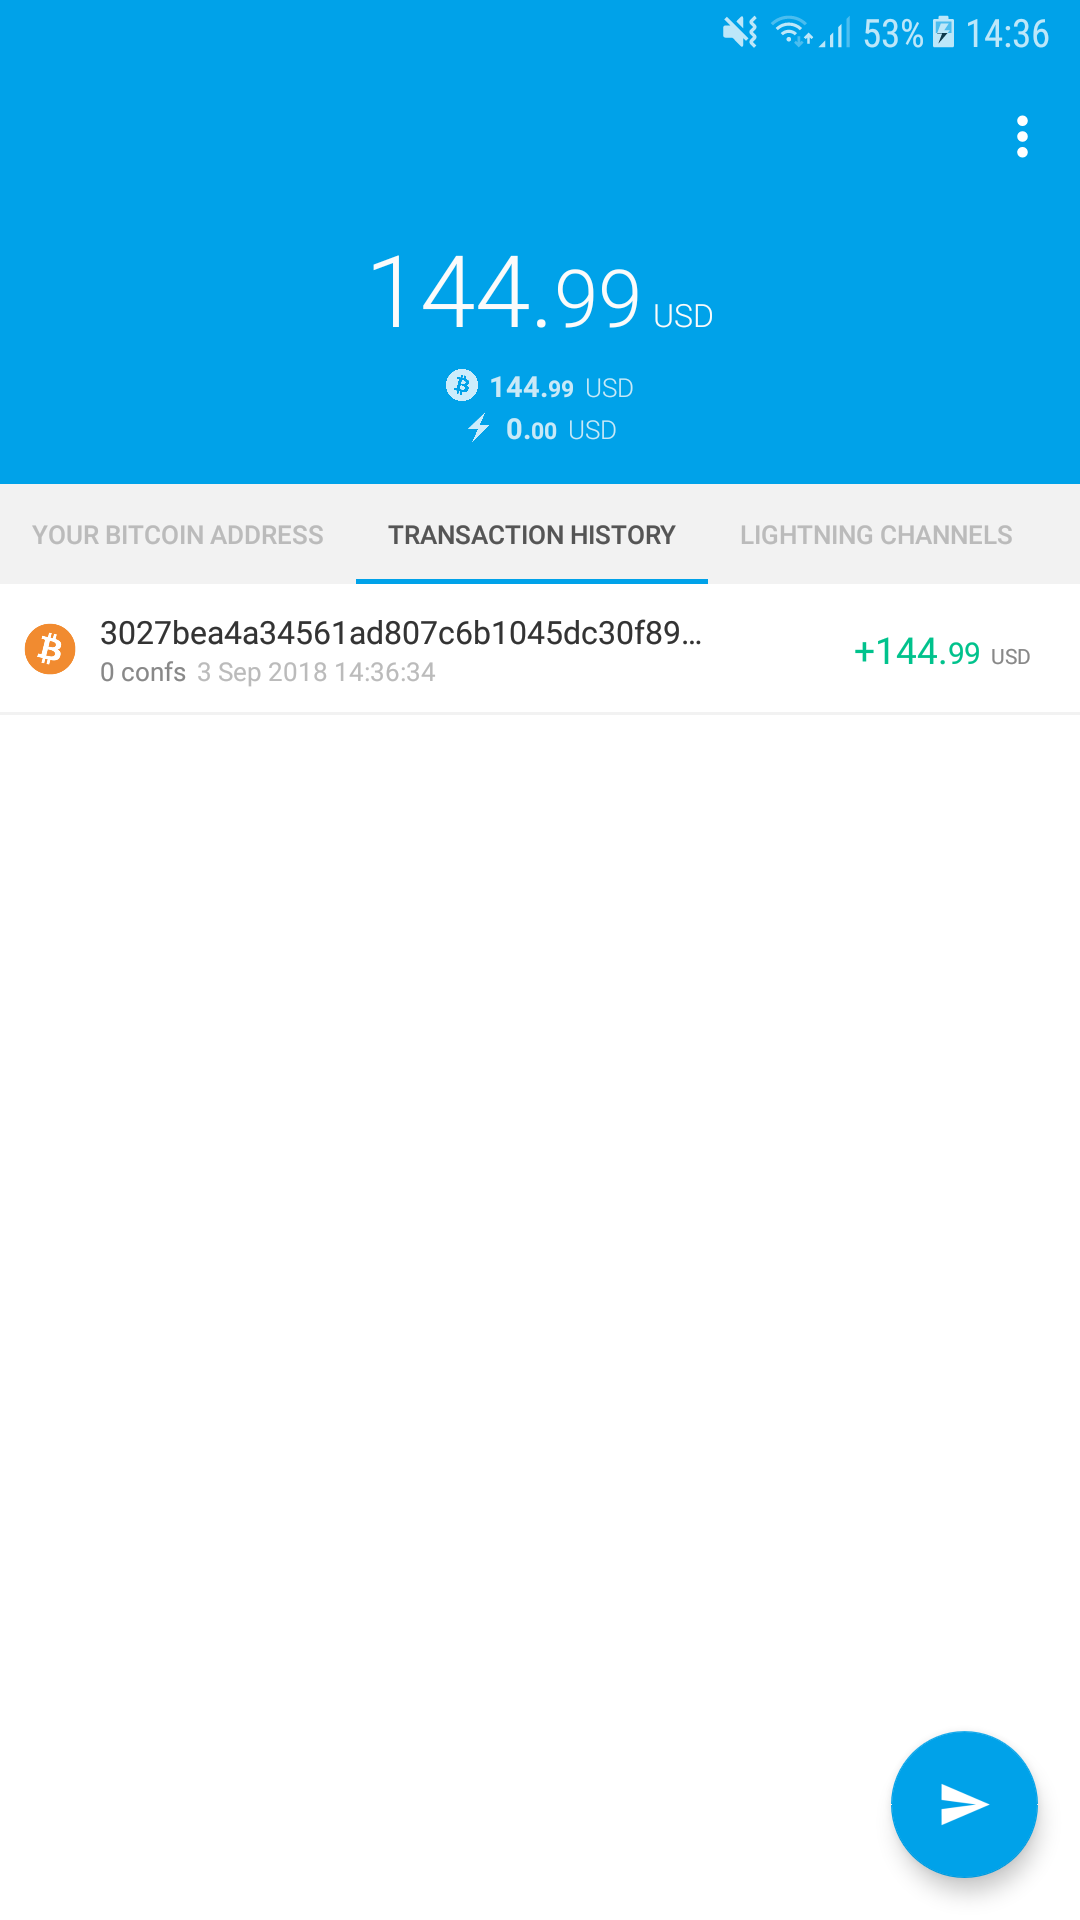
The transaction was registered by the Bitcoin network, but has not been confirmed yet (“0 confs”). As soon as there are at least 3 confirmations reached, the transaction is considered to be final and the amount can be used/spent in the app.
More information about buying bitcoins at the SBB ticket machines.
Step 3: Open a channel to Puzzle ITC’s node
After we have three confirmations on our incoming transaction, we can proceed to the last
step of our setup process: We are going to open a channel in the “Lightning Network”.
This is like charging a prepaid card. The charging process can take a while but as soon
as the amount is on the card, it can be spent easily and immediately.
This last step in our tutorial will also take a moment because there will be another Bitcoin transaction that needs to be written into the blockchain and then confirmed three times. But this is the last step where we need to wait. As soon as the channel is open, everything will be as fast as lightning.
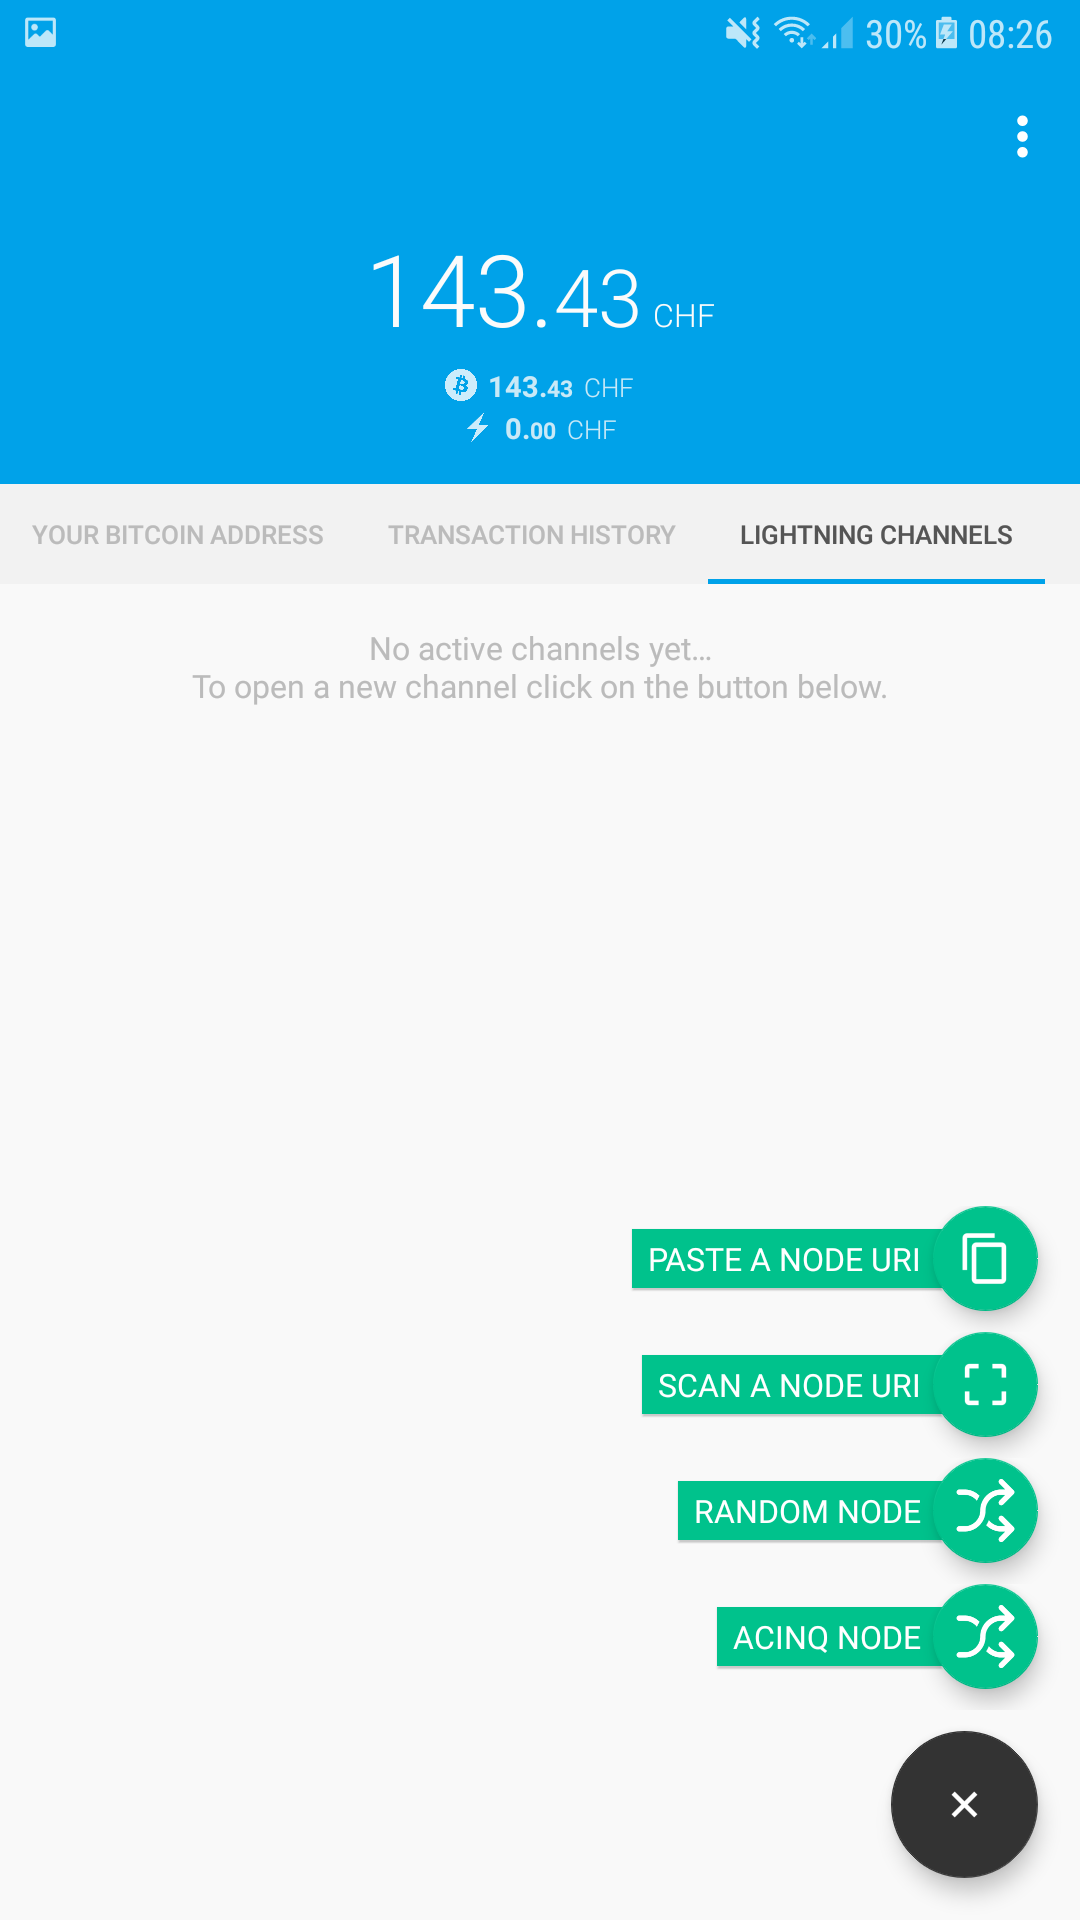
- With a swipe left, we go to the tab “Lightning Channels” in our app and click the button
at the bottom.
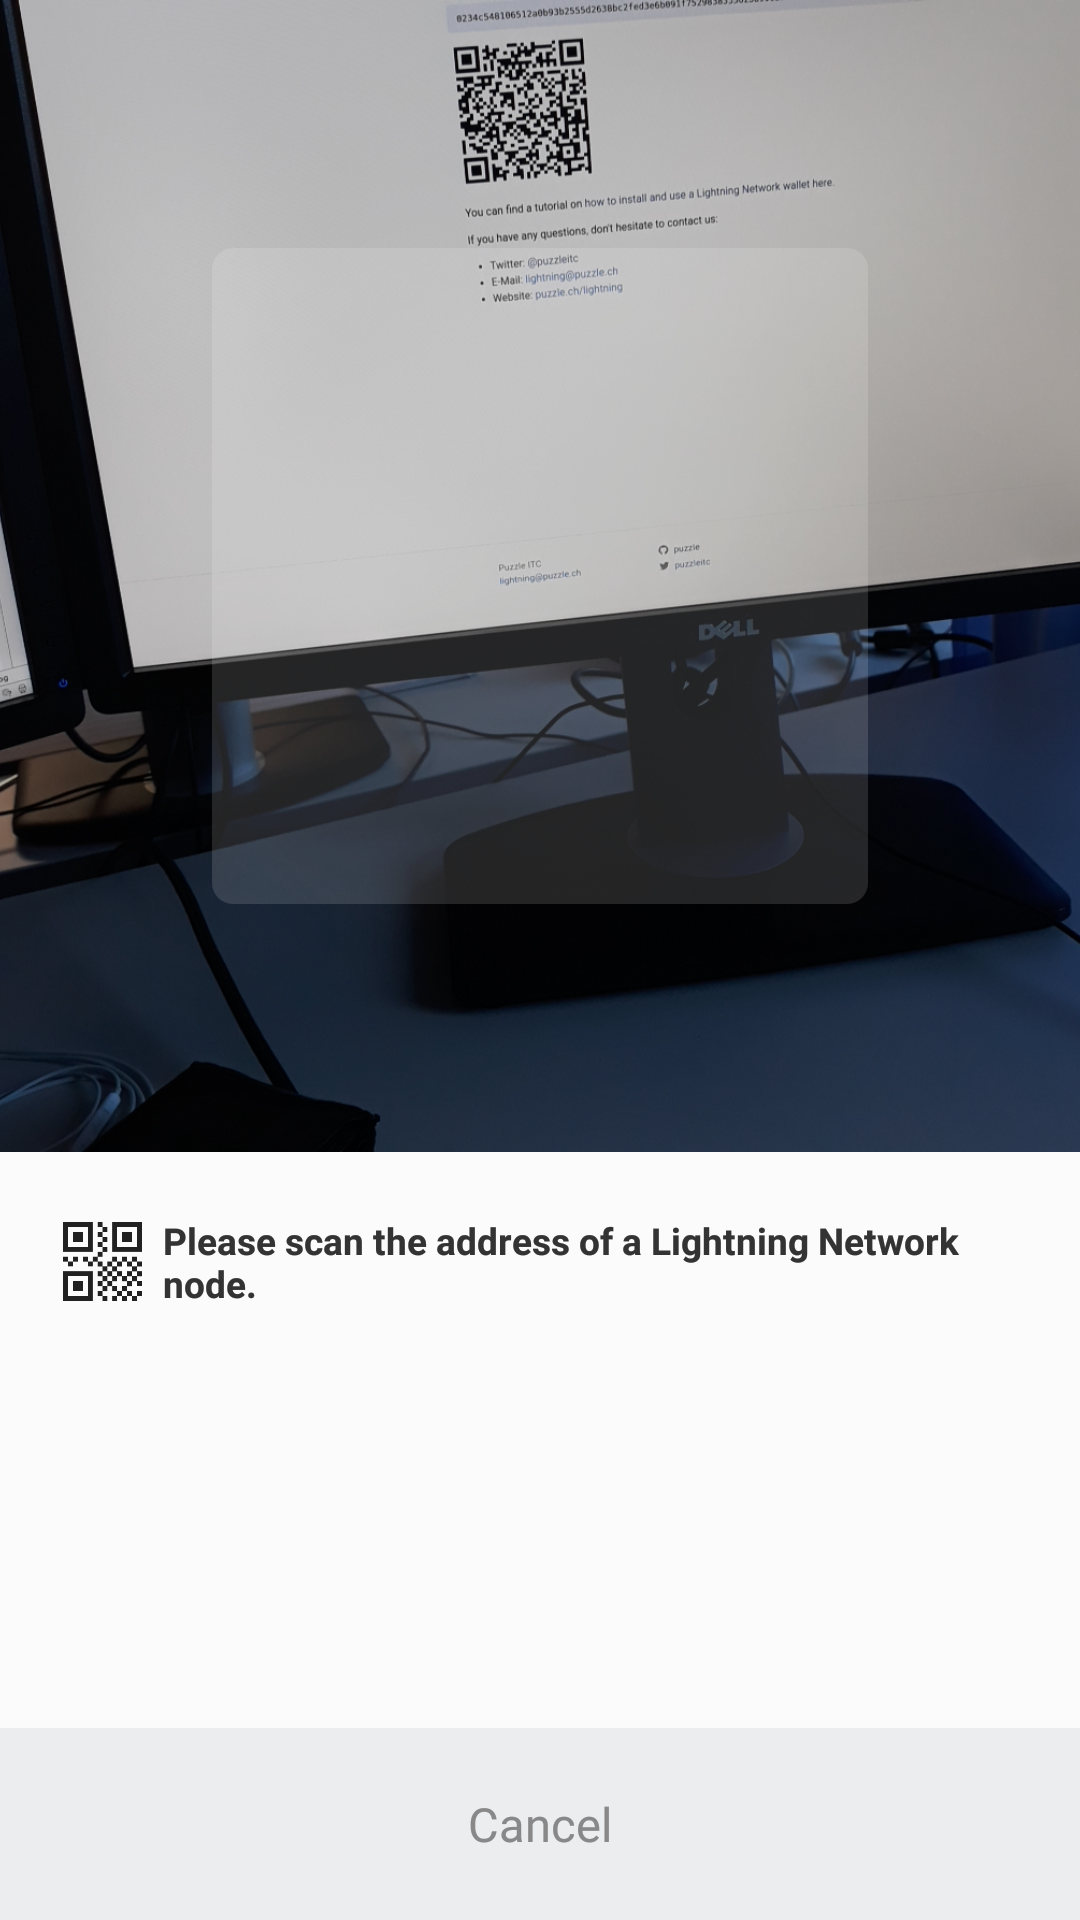
If we have a PC or another device available near us, it’s easiest to open the website lightning.puzzle.ch there and scan the QR code with our mobile phone. To do so, we select “Scan A Node URI” in our Eclair app and then scan the QR code that is displayed on the website.
If we only have our mobile phone with us, we open the website lightning.puzzle.ch in our phone’s web browser and copy the text above the QR code. It’s important to copy everything, including...@lightning.puzzle.ch:9735. In Eclair, we select “Paste A Node URI” and insert the text we just copied. - The screen of our app should look something like this now:
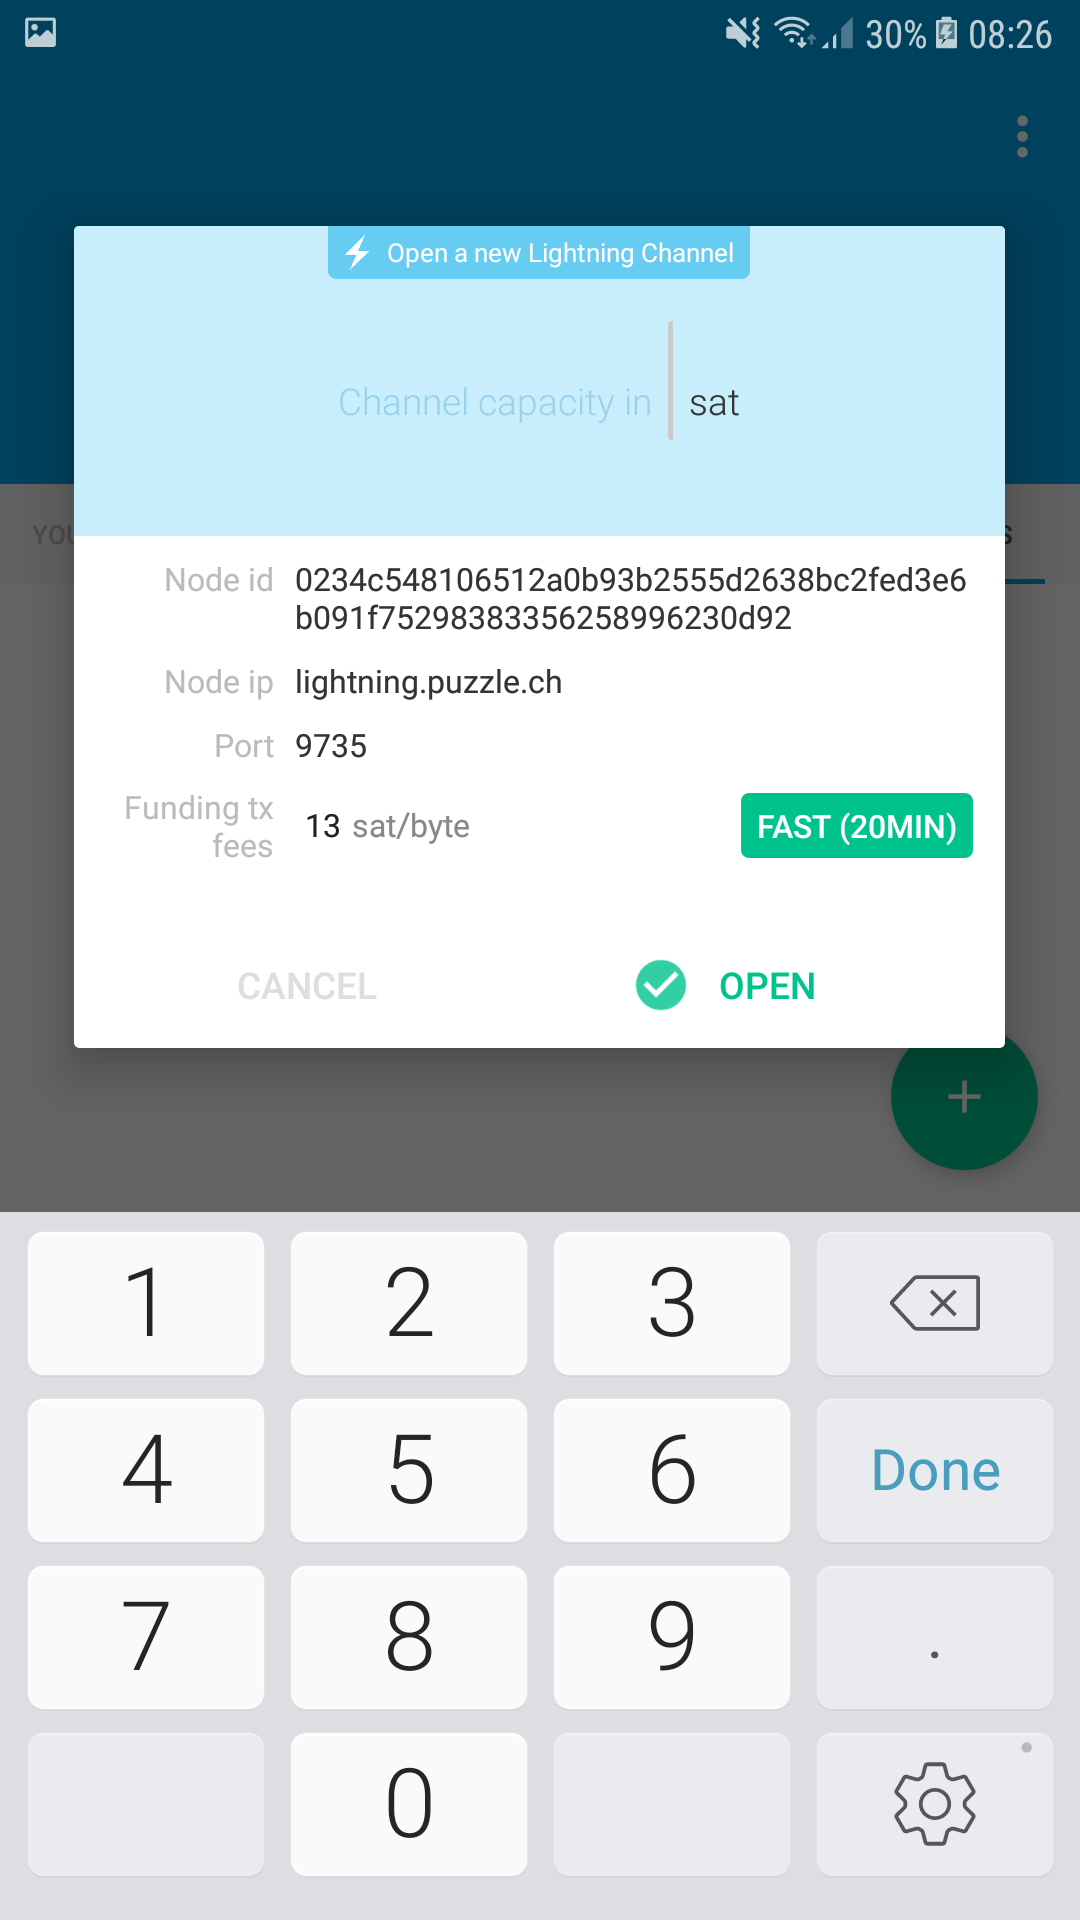
- Now we will need to choose the amount of bitcoins we are going to “charge” our channel with.
The maximum possible amount is 16’667’000 Satoshi (=0.16 BTC) per channel. But we most likely
bought a much smaller amount and want to use all of it for our channel. This is possible,
we just need to subtract a small amount of approx. 1000 Satoshi (=0.00001 BTC) for the channel
funding transaction fee.
So if we have, for example, 5’000’000 Satoshi available (according to the balance our wallet shows us), we are going to enter 4’999’000 as the “Channel capacity”. - If the amount is accepted, the channel should now be opening:
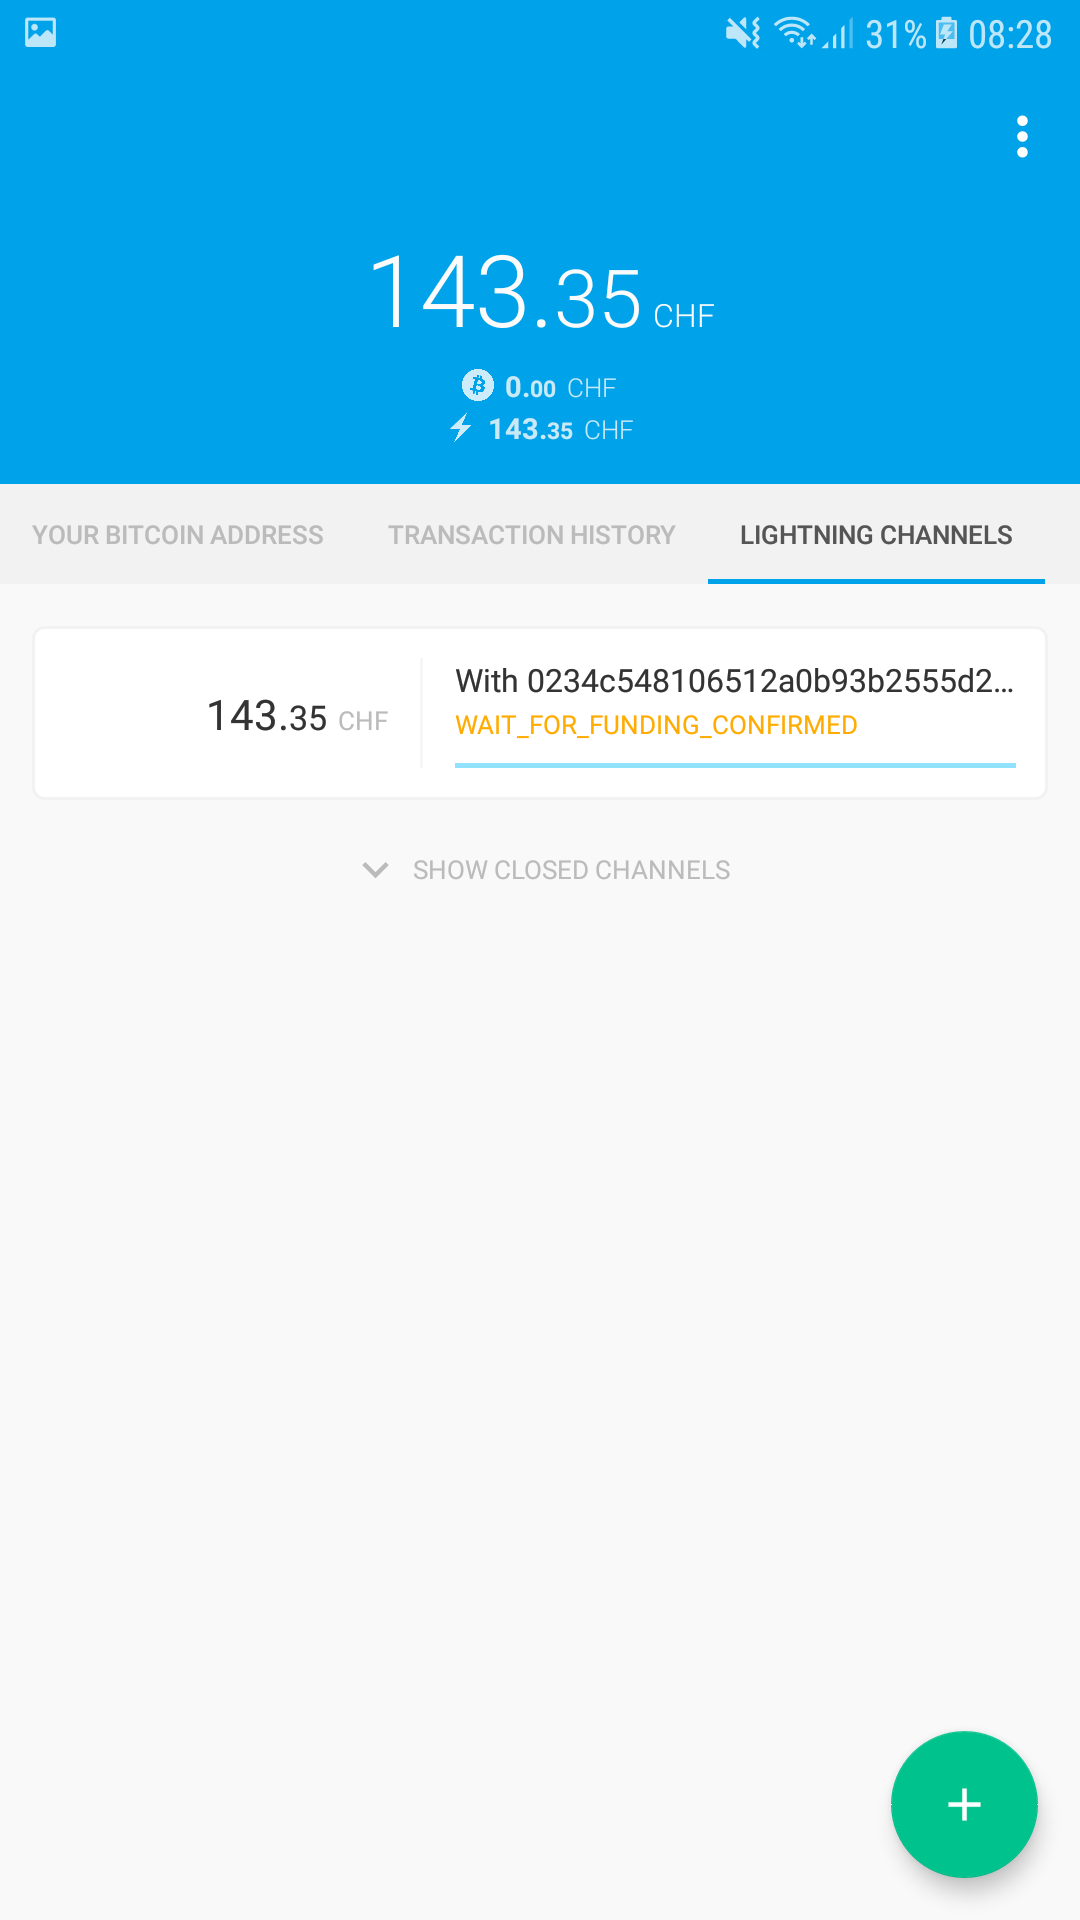
If the selected amount was too big, there will be an error message displayed and the channel might disappear from the channel list. Try again by choosing a smaller amount as the channel capacity.
This step might appear to be unnecessarily complicated and in fact it is. It will most likely be abstracted away from the user and be handled automatically. There are a lot of people working on the usability and user experience of these apps, so we expect this to be much easier in the future. - After three confirmations the channel should be ready:
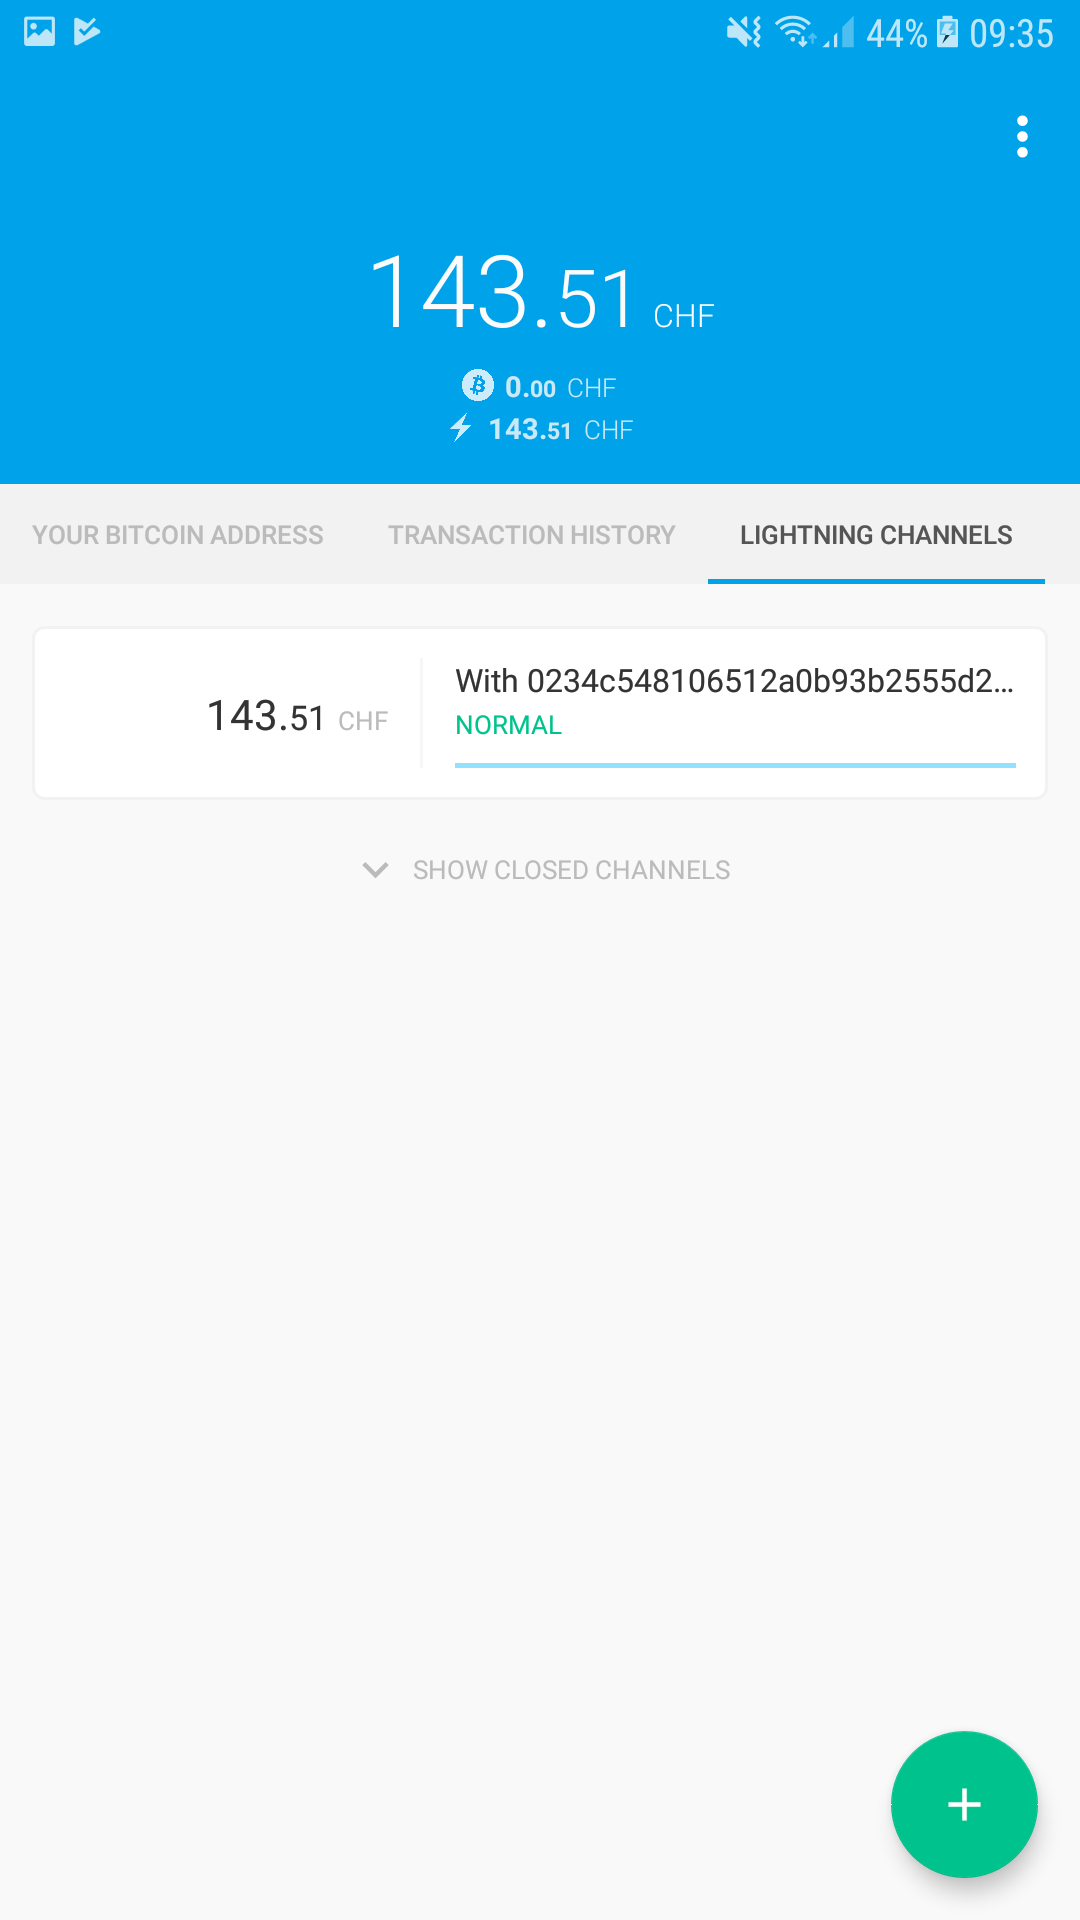
- Everything is ready for “Lightning Network” payments now!
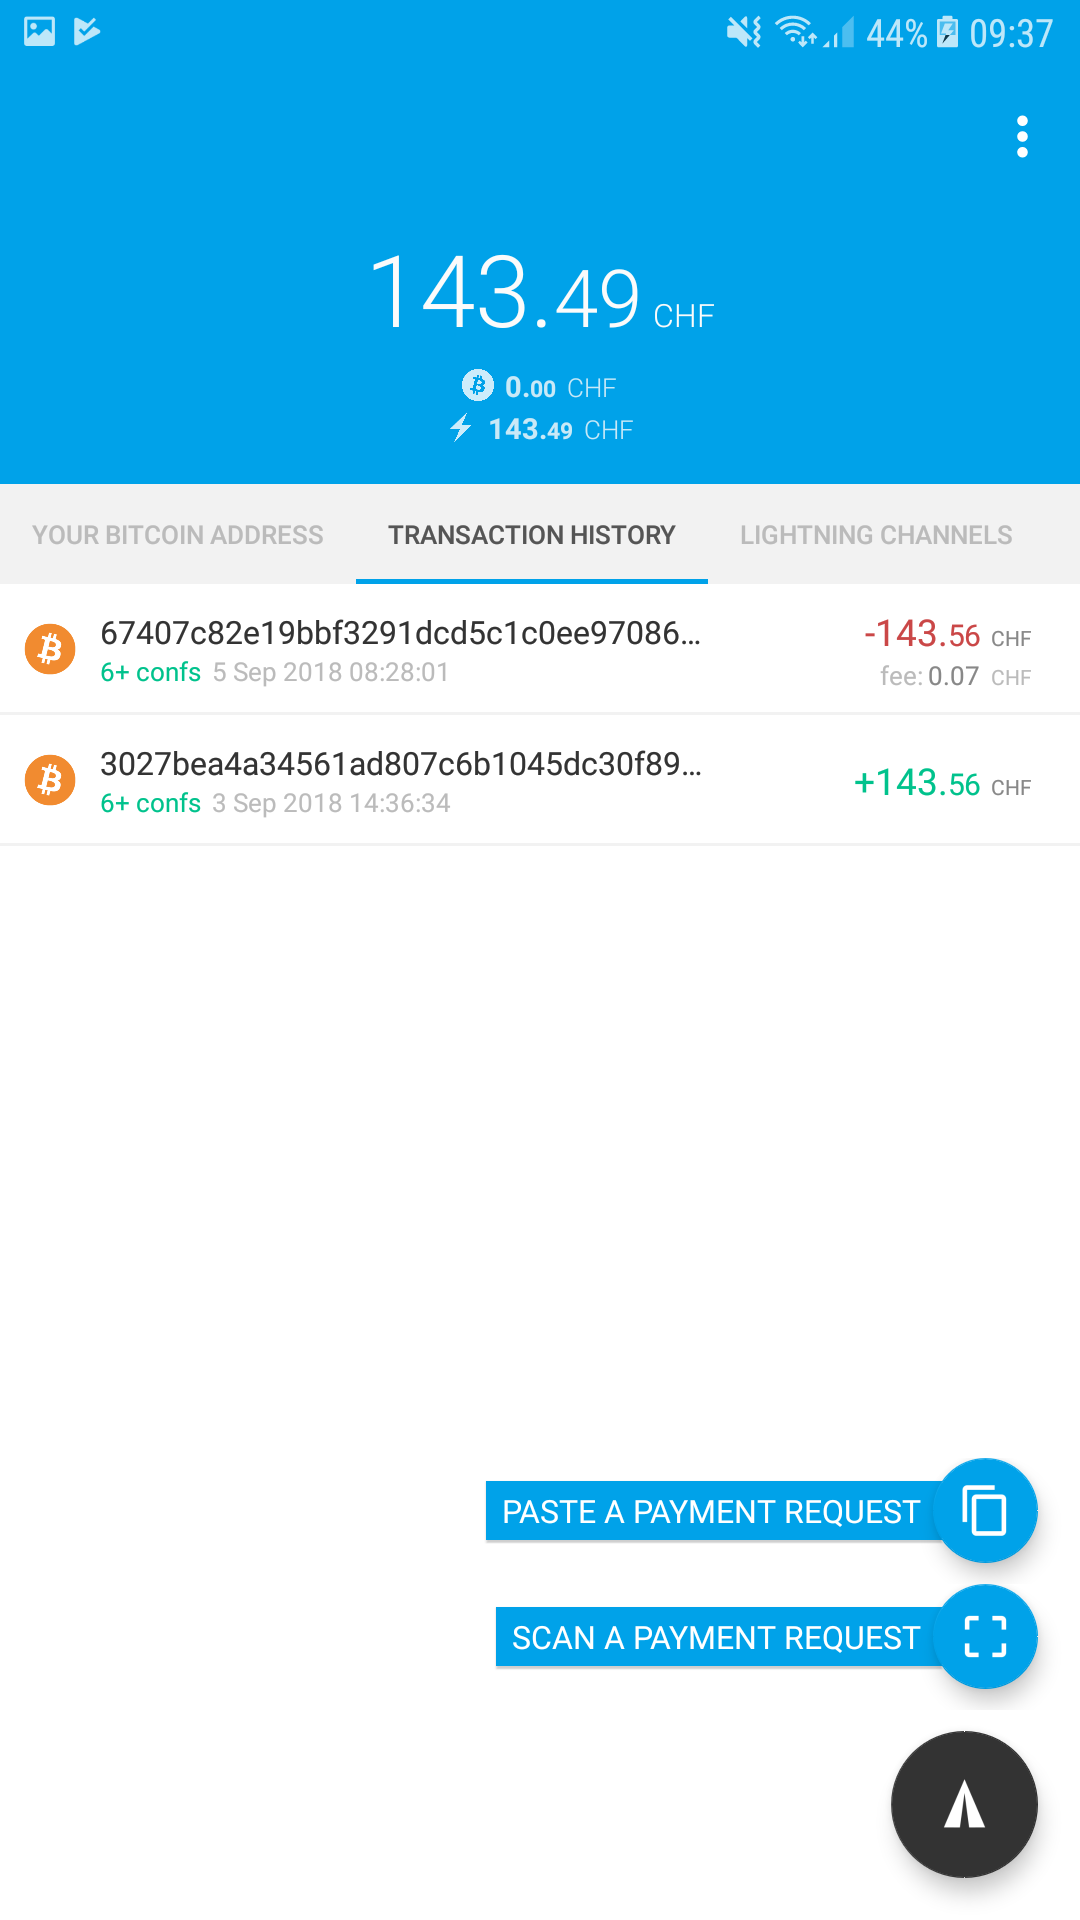
All you need to do is go to the tab “Transaction History”, tap the button on the bottom right and select “Scan A Payment Request”:
Scan the QR code of something you want to pay with the Lightning Network and review the payment details shown by the app:

If you want to proceed with the payment, tap the “Pay” button.
Did the payment work? Yes? Congratulations and welcome to the future of payments!
FAQ
- Why are we opening a channel with Puzzle ITC’s node?
- The big advantage of the Lightning Network (and Bitcoin in general) is, that everybody can
just participate and build their own node. So why should I connect and open a channel with
Puzzle’s node and not any other?
Of course that’s up to every person to decide for themselves. But we, Puzzle ITC, promise that we are going to keep the fees of our channels low and liquidity high. We will provide large and stable payment channels to all Lightning Network enabled Swiss merchants so our users will always have optimal payment routes to all the shops they want to conduct business with.
- The big advantage of the Lightning Network (and Bitcoin in general) is, that everybody can
just participate and build their own node. So why should I connect and open a channel with
Puzzle’s node and not any other?
- Can I receive payments through the Lightning Network?
- Yes, you have to enable the functionality in the settings using the switch
Enable receive over Lightning. You might be prompted to close and recreate your channels since the retaliation window for remote uncooperative close has to be of 2016 blocks.
- Yes, you have to enable the functionality in the settings using the switch
- What happens, if the balance of my channel is used up?
- If the balance of a payment channel is used up, it cannot be used for payments again.
A new channel has to be opened. In the future, when receiving money through the Eclair app is
possible too, it will be possible to get balance back through a channel that is already open.
For example, by receiving part of your salary through
the Lightning Network would mean the channels could be refilled and would be ready for payments
again. Another possibility would be a financial institute that offers buying Lightning Channel
balance with CHF directly.
In theory a channel never needs to be closed as long as balance is being moved back and forth.
- If the balance of a payment channel is used up, it cannot be used for payments again.
A new channel has to be opened. In the future, when receiving money through the Eclair app is
possible too, it will be possible to get balance back through a channel that is already open.
For example, by receiving part of your salary through
the Lightning Network would mean the channels could be refilled and would be ready for payments
again. Another possibility would be a financial institute that offers buying Lightning Channel
balance with CHF directly.
- What do I do if my channel is always “OFFLINE” or in another error state?
- The Eclair app has some bugs still that are hopefully going to be fixed soon.
Sometimes it helps to close the app completely (through the android app overview menu) and re-start it again.
Sometimes it also helps to try to open a new channel. The existing channels are then checked and refreshed as well.
You can also try consulting the FAQ of Eclair.
- The Eclair app has some bugs still that are hopefully going to be fixed soon.
- When will there be an app for Apple iOS?
- There already is a list of wallet apps that are available
for iOS, but only on Bitcoin Testnet. When the first of them will be released for Mainnet is hard to
say. Our guess is that by the end of 2018 there should be one or more apps for iOS be available for
Bitcoin Mainnet that don’t require the user to set up their own “full node”.
If you are tech savvy and trust yourself to set up a Lightning Network node, you can remote control that node from iOS with apps available today. There are tutorials available here and here.
- There already is a list of wallet apps that are available
for iOS, but only on Bitcoin Testnet. When the first of them will be released for Mainnet is hard to
say. Our guess is that by the end of 2018 there should be one or more apps for iOS be available for
Bitcoin Mainnet that don’t require the user to set up their own “full node”.